
Effortless Scheduling Page Creation: Your 10 Step Guide to using HubSpot’s Meeting Tool
")
Written by
Ellie Pavlichek
Created on
September 8, 2023
Effortless Scheduling Page Creation: Your 10 Step Guide to using HubSpot’s Meeting Tool
It’s time again for another look at what I’ve been learning in the great wide world of HubSpot. This time, I’m excited to share my journey into the world of HubSpot’s Meeting Tool—a fantastic resource that has enabled me to effortlessly connect with clients and provide them with real-time access to my calendar for scheduling. Through HubSpot’s Meeting Tool, I’ve been able to establish a streamlined scheduling page, simplifying the process of booking meetings with clients.
As an account manager, this is an invaluable tool. The reasons for using this scheduling page are endless, but first you’ve got to have it set up! Let me walk you through how I did it.
Connecting Your Calendar
Step 1
In order to optimize my scheduling page, I connected my calendar to HubSpot. This way, my calendar would link with the HubSpot Meeting Tool, and show my current availability in the scheduling pages I created.
Using HubSpot’s Meeting Tool
Step 2
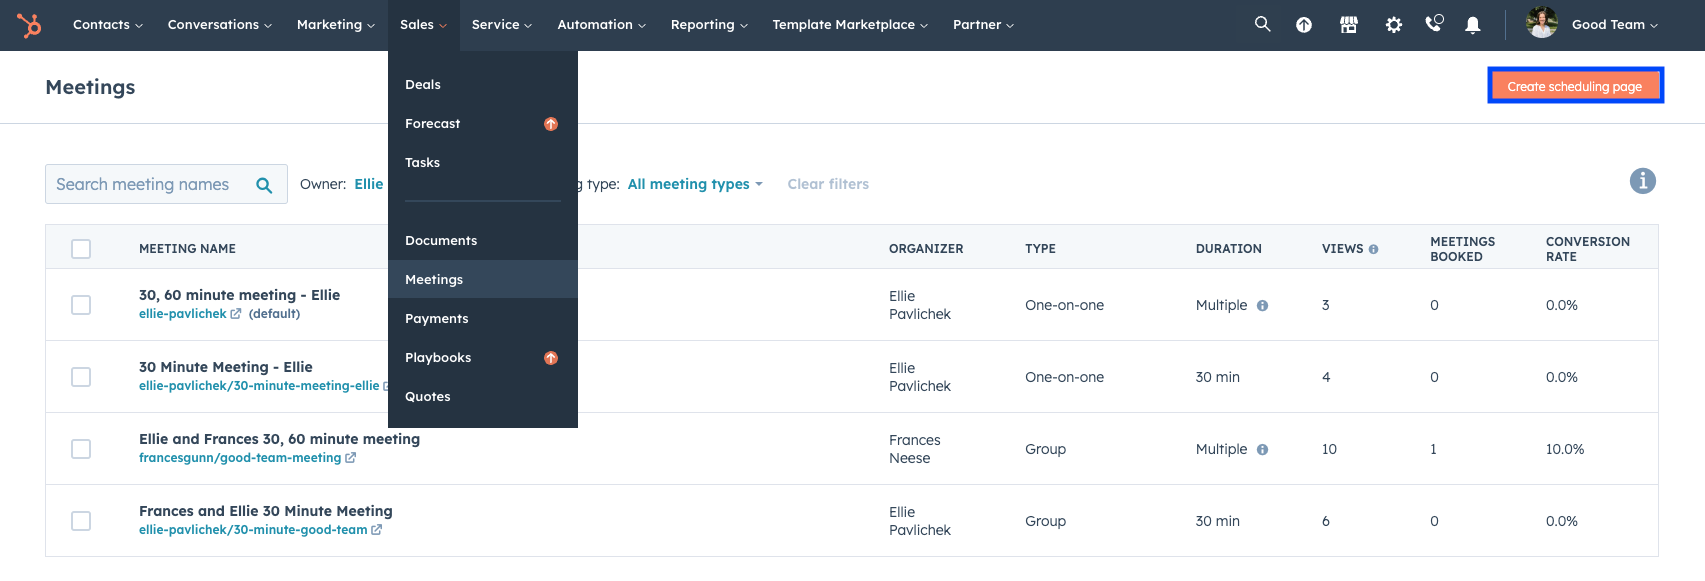
I then navigated to the meeting page within my HubSpot account. This is done by going to Sales > Meetings. To create a new scheduling page, I clicked on the orange “create scheduling page” button in the top right corner.
Step 3
The next step was to choose the type of meeting that I wanted to create. There are three different types of meetings:
- One-on-One: scheduling time with just you
- Group: scheduling time with all team members selected
- Round Robin: shows the next available time slots of a single team member, but allows you to select multiple team member’s schedules to pull times from
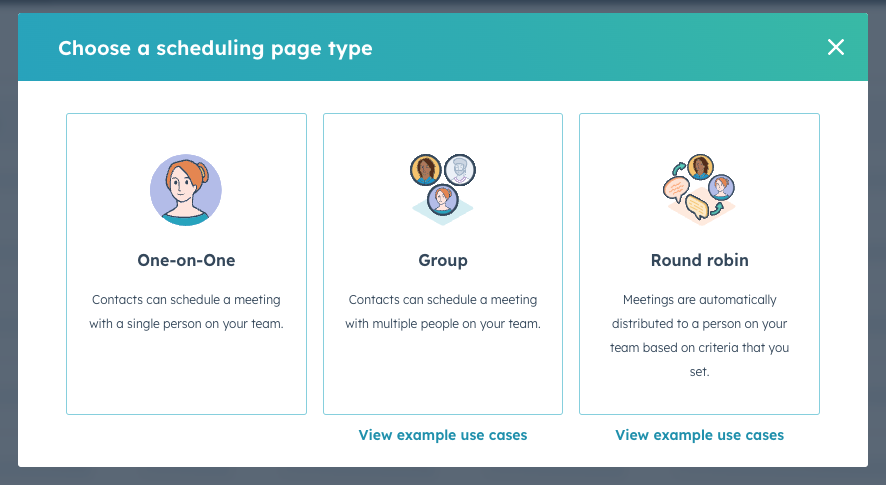
Group and Round Robin are only available on Sales and Service Starter, Professional, and Enterprise subscription levels. I only wanted to create a scheduling page for myself, so I chose the One-on-One option.
Step 4
Here’s where things got fun! Time to fill out what I wanted to show up on the calendar invite when someone booked a meeting with me.
Note: The Internal name is meant for your eyes only on the meetings page, not visible to contacts.
I went through and filled out my information. You can add personalization tokens, such as contact’s first name or company first name in the event title. I included the contact’s first name, ensuring that when someone reserves a meeting via the final link, the name automatically updates to match their form entry.
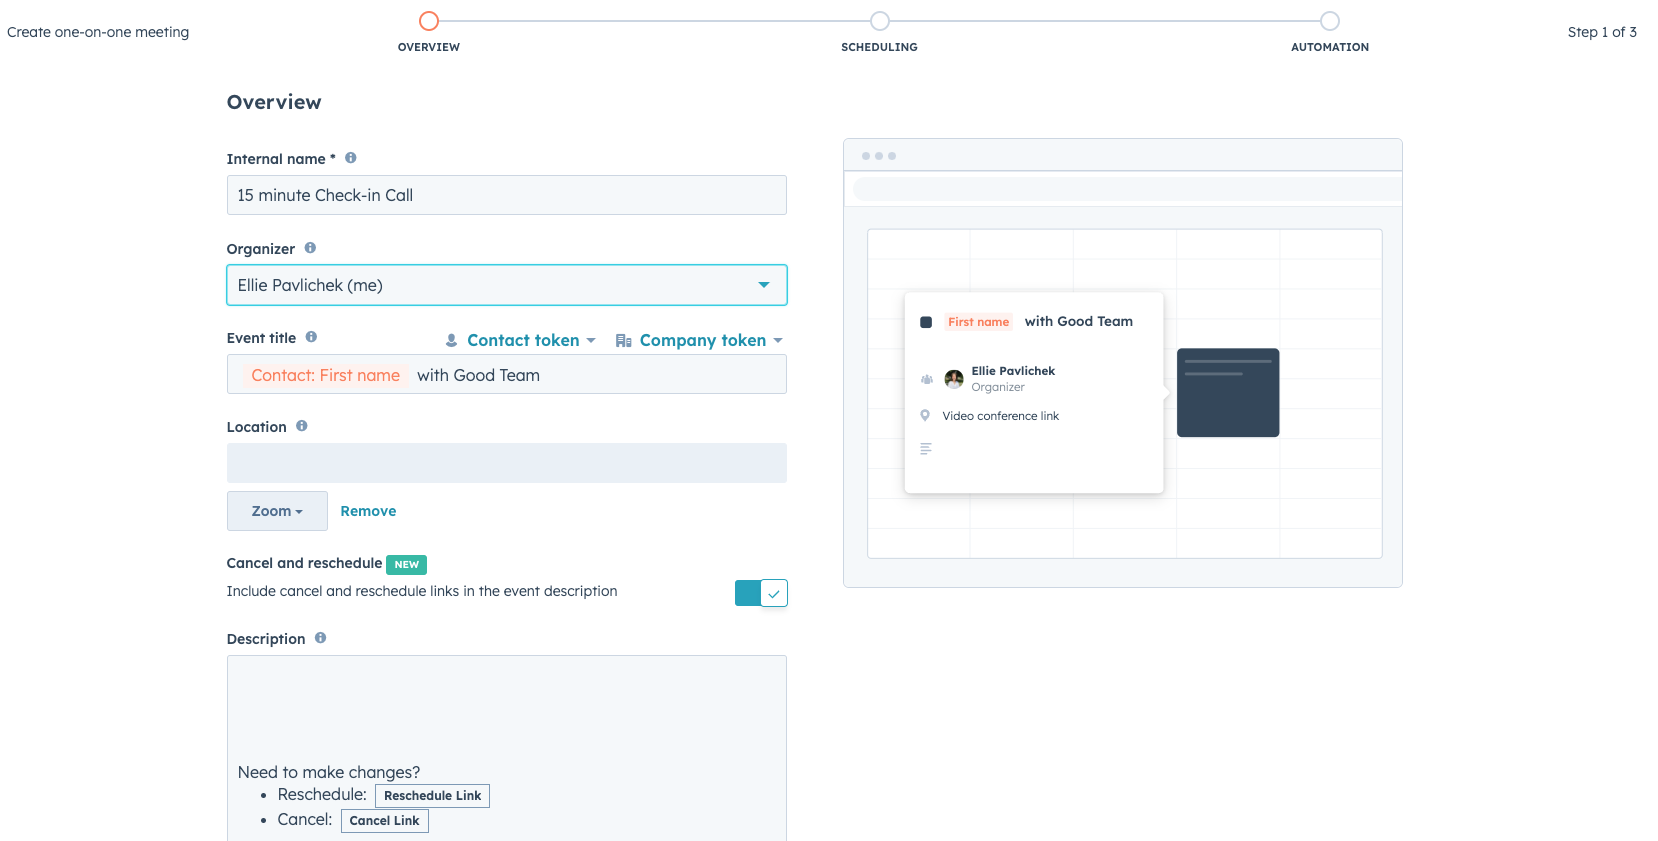
Step 5
I work remotely, so I added a Zoom meeting link when someone books a meeting in the location. This way, attendees were aware that the meeting would take place online. That link will auto-populate in the description after a contact books a meeting through my scheduling page.
You can add a physical meeting location details as well, or integrate a different video conferencing app.
Step 6
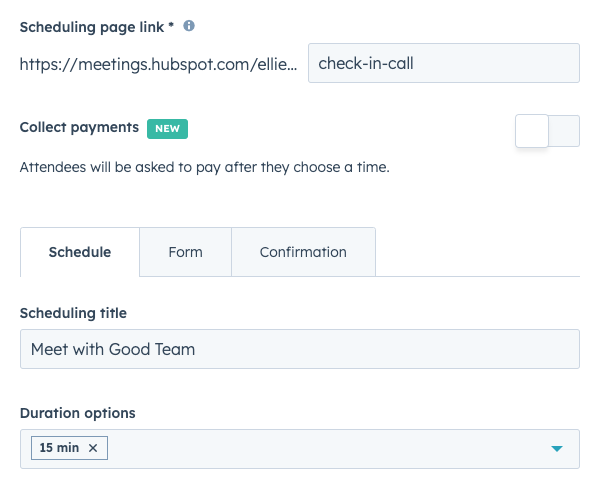
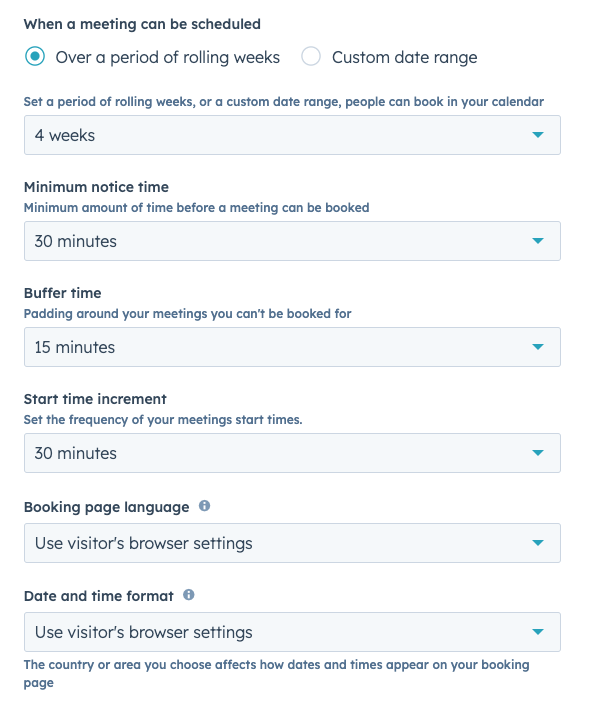
It was time to get ready for scheduling and accepting contacts on the next page. At the very top, I had the option to change the permalink to my scheduling page.
I also was able to edit the title of my scheduling page, as well as choose the duration option. I was creating a 15 minute check in call, so I only chose 15 minutes. Multiple duration options can be offered, enabling contacts to choose their preferred meeting length.
I then personalized my work hour availability and selected my time zone.
Step 7
I went into additional settings after this, and selected from the choices to show our Good Team logo on the scheduling page. I also had the choice to set this logo as my HubSpot profile image by selecting Organizer Image.
The next settings control my calendar. Typically, I set my scheduling pages for rolling week periods, though custom date options are also available.
There are a ran
ge of other options in this section, allowing for control over when a meeting will be booked.
Step 8
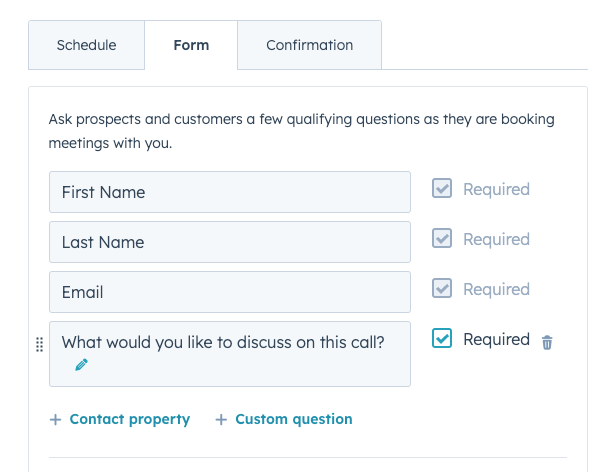
Now I needed to customize the form a contact would fill out after they’d chosen the date and time they wanted to meet. I added a custom question to my form, enabled Spam Prevention, and included a GDPR Data Privacy notice.
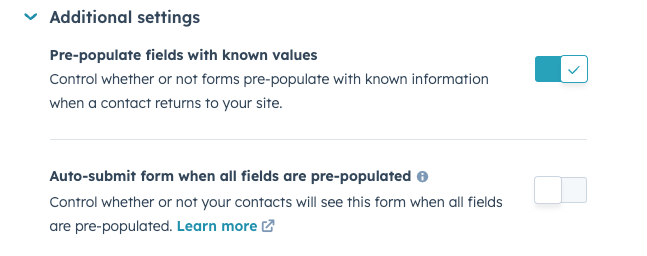
Under additional settings, I turned on the feature that would pre-populate known contacts. These are optional, but I always like it personally when I don’t have to fill out my email again on a form. Taking some of that work off us, HubSpot. Nice!
Step 9
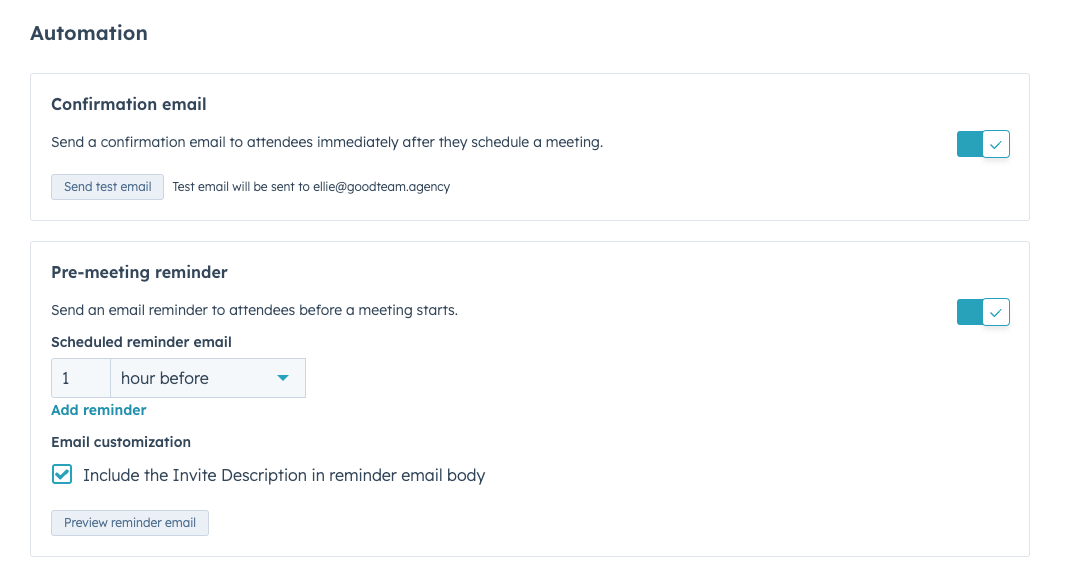
I was nearly finished! The last thing I had to set up was sending a confirmation email after scheduling, and deciding if I wanted to send a reminder email. I love a good reminder, so I did set that up. You can add the meeting description info if you’d like to this, and adjust when you’d like the reminder to be sent.
Step 10
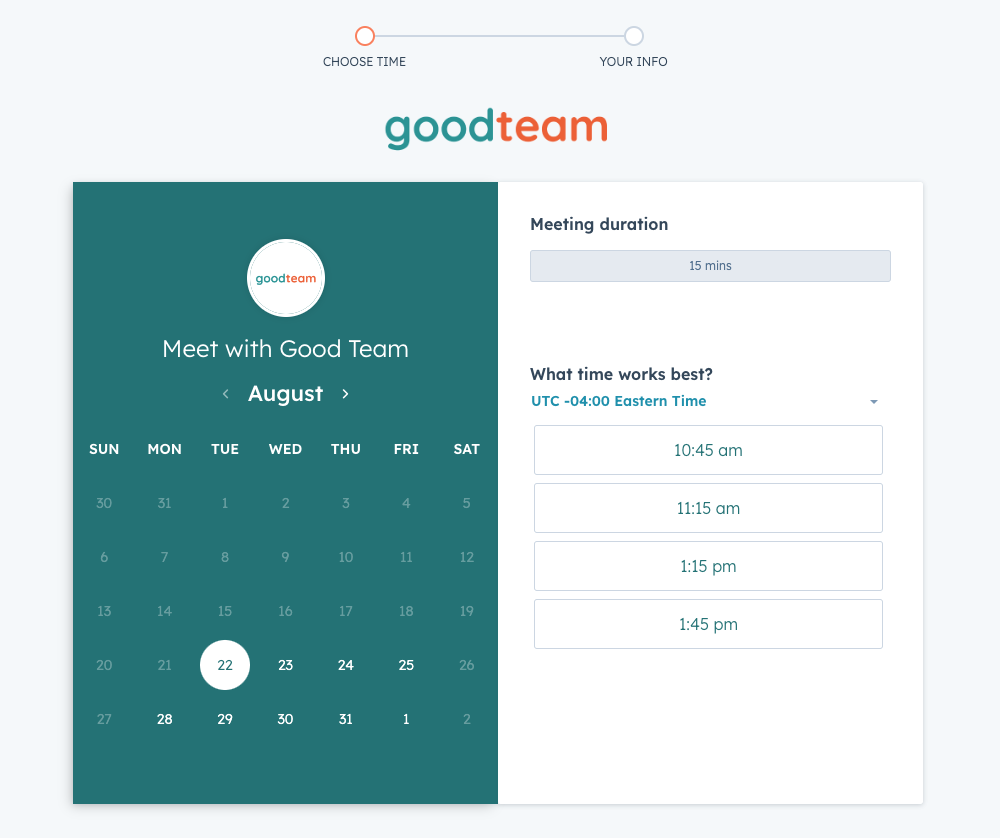
Time to test out the scheduling page! I was redirected back to the meeting page, and I found the scheduling page I just created. I clicked on the link, and I was brought to a new tab, where my beautiful new scheduling page awaited me.

I clicked through the different date and time options, and referenced my calendar to ensure it was reflecting my open times. It was! Success. One scheduling page created and ready to be sent out. The link created is shareable, granting easy access for booking meetings.
Scheduling Page Efficiency
Creating a scheduling page absolutely lightens the load of needing to find the open times in the upcoming week to send in an email. You can show the meeting dates and times in the user’s browser settings – meaning time zone clarity. You can create different scheduling pages for specific durations of time, or have all the durations you’d like to offer on one scheduling page. There are so many options! I’m excited to start sending out my meeting link, and to spend more time connecting with our clients. If you’d like more information on scheduling pages or have troubleshooting questions, you can find that here.
If you need HubSpot Help, that’s what we do at Good Team. Take a look at some of our other HubSpot resources or take a look at our HubSpot Services.
Get Your Free DIY 40-Point HubSpot Audit with Videos!
